![]()
Database Repository
The database repository keeps a local copy of database field definitions allowing you to modify field properties for wizard-generated pages and to insert database fields into any RPG Smart Page.

File Name
The file name indicates the current database file you are working with. Type in or select the name of a physical or a logical file. If you have previously used a particular file in the database repository, its name will be available in the drop-down selection.
If the field definitions for the selected file are available locally, the record format name and available fields will automatically be populated; otherwise, you must click the blue button to get the field list from the iSeries.
Library Name
The Library Name field is used for locating the specified file when the "Get Field List from iSeries" button is used. It is recommended that you leave this field blank, in which case the compile-time library list defined under Tools -> Options is used. To change the library list on the fly, click on *LIBL.
Insert with Label
Check this box to tell RPGsp to place a field description label to the left of a field when inserting fields from the database repository onto an RPG Smart Page.
Field Listing
Shows a listing of database fields for the selected database files.
If a listing is not shown, click the "Get Field List from iSeries" button. The following columns appear in the listing:
Right-click any field for more options:
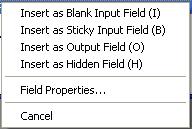
Or you can double-click a field to go directly to Field Properties.
This option inserts an RPG field as a blank input field. A Blank Input field does not pre-fill the input field's value dynamically when a page is loaded. The field's value is initialized either with blanks or with a constant. The value entered by the user is not remembered from one page load to another. It is similar to I (input) fields in DDS Display File definitions. Make sure to place all input fields within a form.
The Blank Input HTML is defined under field properties. Generally, blank input fields are standard textboxes. If Insert with label is selected, a description of the field is inserted first.
![]()
This option inserts an RPG field as a sticky input field. A Sticky Input field pre-fills the input field's value automatically. The RPG variable used to load the Input control's value is named the same as the input control itself. This allows you to create pages that remember user entries from one page load to another, and lets you dynamically initialize input controls with RPG calculations. Sticky Input fields are similar to B (both input and output) fields in DDS Display File definitions. Make sure to place all input fields within a form.
The Sticky Input HTML is defined under field properties. Generally, sticky input fields are standard textboxes initialized with a value. If Insert with label is selected, a description of the field is inserted first.
![]()
This option inserts an RPG field as an output field. The Output HTML is defined under field properties. Generally, output fields are coded like this:
<% String %>
or
<% %Char(Number) %>
If Insert with label is selected, a description of the field is inserted first.
This option inserts an RPG field as a hidden field. Hidden fields carry pieces of information when a form is submitted. Hidden fields are not displayed by browsers, nor do they allow the user to enter data. They are used to "trick" the server into thinking the user actually entered some data into the specified field. Make sure to place Hidden fields within <FORM> and </FORM> tags. Hidden fields have no meaning outside of a form.
Hidden fields are coded in a similar way as sticky input fields except for the type=hidden attribute. Hidden fields are generally resized in design view so that they do not take up much room. Hidden fields are invisible when you run or preview the page.
The field properties dialog allows you to assign the following attributes to a database field:
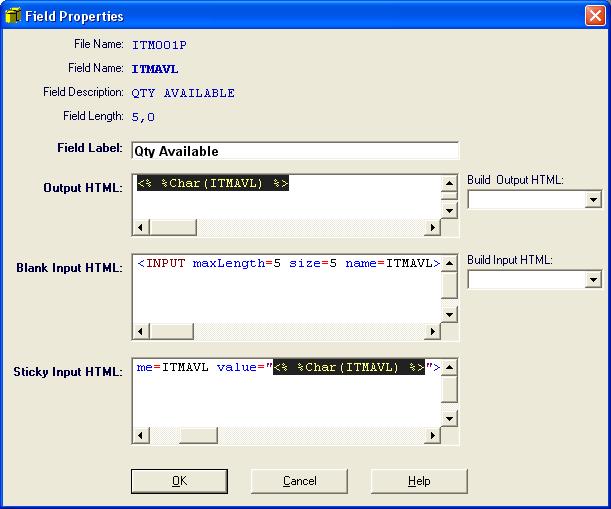
The field properties dialog can automatically produce the HTML code for you. It offers the following choices for building input and output HTML.
Standard
Standard RPG variable output. Numeric variables are converted to characters first.
Trim Spaces
RPG variable output with leading and trailing spaces removed.
Trim Trailing Spaces
RPG variable output with trailing spaces removed. In RPG, it is common to have fixed length fields, which cause extra spaces in web output and take up extra bandwidth. This issue can be resolved by trimming the trailing spaces.
Dynamic Image
This is intended for fields that hold the URL or file name of an image. The dynamic image HTML code will display the actual image instead of the URL or file name. If you are storing your dynamic images on the IFS, you must place them in the Root IFS folder or one of its subfolders as defined under Tools -> Options. By default, the Root IFS folder is /web/.
URL
This is intended for fields that hold a dynamic URL. Instead of simply displaying the URL, the URL becomes a link on the page.
Multi-line Text
Since html pages ignore spacing and line breaks, a special function is needed to properly display multi-line data. Any data entered through a text area should be treated as multi-line text for output purposes.
Amount Field
A numeric RPG field formatted as a dollar amount for output.
Date Field
A numeric RPG field (not a Date field) formatted as a date field with the Y edit code.
Phone Number Field
A numeric RPG field formatted as a phone number (USA, Canada) format.
Edit codes provide a means of editing numeric fields according to a predefined pattern. When selecting this option, you will automatically be prompted with an Edit Code selection and preview window.
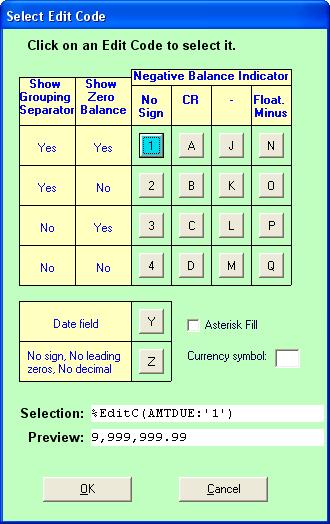
Click to select an edit code. When you see the desired pattern in preview, click Ok.
TextBox
Uses a standard textbox for accepting input into the RPG field.
Text Area
Uses a text area (a multi-line text input control) for accepting input into the RPG field.
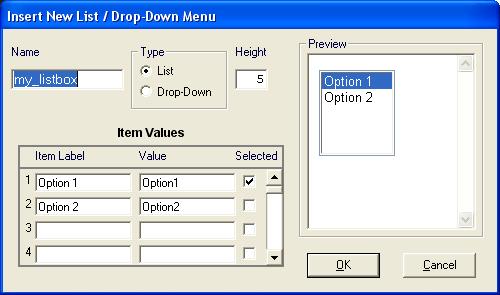
List/Drop-Down Menu
Uses a List Box or a Drop-Down Menu for accepting input into the RPG field. A List Box or a Drop-Down Menu contains multiple options. Each option has a corresponding label and a value. The label is the name of the option that appears on the web page. The value of the selected option is sent to the server as input entered into the field. When selecting this option, you will automatically be shown a wizard for building a List/Drop-Down Menu.
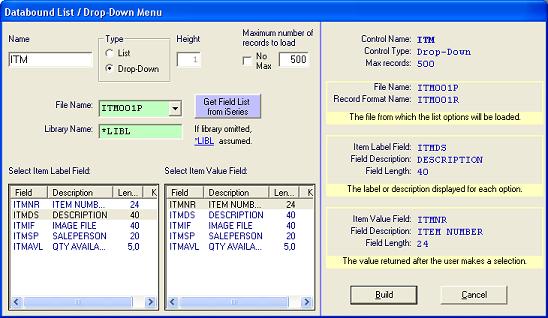
Databound List/Drop-Down Menu
A Databound List/Drop-Down Menu loads its options from an iSeries database file. It is different from a standard List/Drop-Down Menu, because it does not use predefined (or constant) options. The options are loaded dynamically. When you select a Databound List/Drop-Down Menu, a wizard is displayed to help you build the RPG and HTML code for it.
Uses a checkbox control for input. You will assign a field value for when the checkbox is checked, and when the checkbox is unchecked.
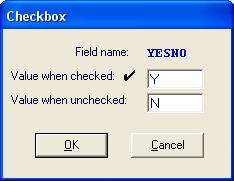
In HTML, when a checkbox is checked, its <INPUT> tag's value is sent to the server. When a checkbox is not checked, its value is not sent, which means RPGspIn() will returns an empty string. This must be handled appropriately in LoadFormData code.
The checkbox option places the value when unchecked as a comment in the Input HTML.
RPGsp wizards automatically pick this value up from the comment line and utilize it in the LoadFormDataCode.
Password Field
Uses a password field for input. Password fields are just like textboxes except the value is obscured as it is entered.
![]()
Textbox w/ Edit Code
Uses a textbox control for numeric input, but formats the initialization value with an edit code. Edit codes provide a means of editing numeric fields according to a predefined pattern. When selecting this option, you will automatically be prompted with an Edit Code selection and preview window.
Uses a textbox with a hyperlink besides it that brings up a selection program. The selection program automatically fills in the field's value. Here is an example:
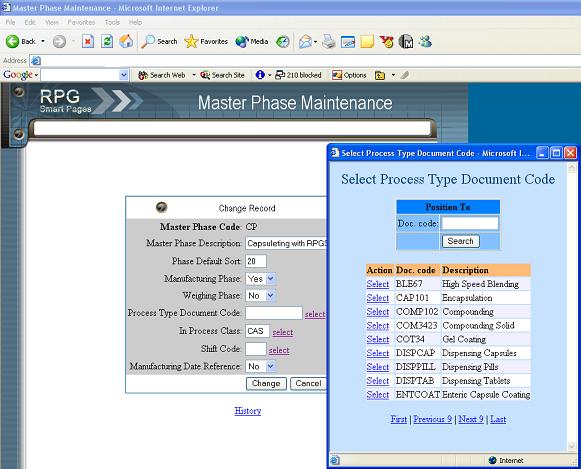
It is similar to field prompting in green-screen applications. You will be asked for the URL of the selection-processing program:
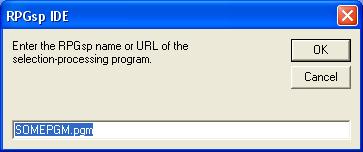
A selection-processing program can be created quickly with the Record Selection Wizard located on the Tools menu.
Uses a textbox with a pop-up calendar. The pop-up calendar fills in a date or a timestamp value into the textbox. The calendar is based on JavaScript functions and files residing in the "../theme_files/" folder. Here are examples:

Date Calendar Example
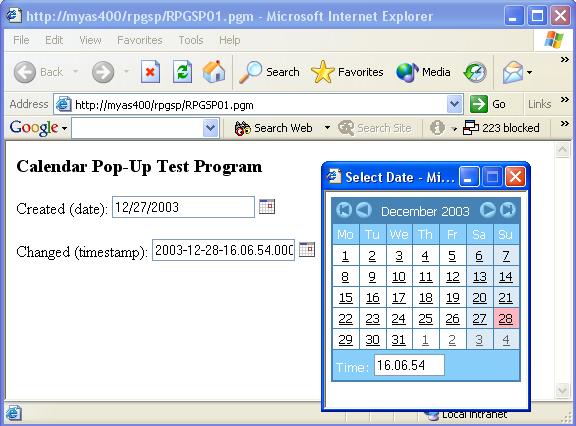
TimeStamp Calendar
Example
When you choose the textbox w/ calendar option, you will be prompted to select the calendar type. The calendar type should match the field's and/or document's date format. *ISO is the default format.
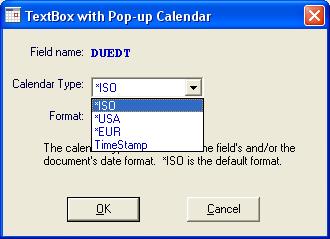
You can choose from the following:
Where yyyy represents
a four digit year;
mm represents the month number;
dd represents the day of the month;
hh represents hours;
mm represents minutes;
ss represents seconds;
xxxxxx represents milliseconds.
Uppercase Texbox
Uses a standard textbox for input except the entry is forced to upper case characters. A standard input field on a green-screen display file, by default, accepts data in upper case only. On the web, however, an html text box accepts mixed case. Uppercase textboxes allow you to easily mimic green-screen data entry fields.
An uppercase textbox uses an in-line style sheet attribute to make characters appear in upper case. The in-line style sheet attribute by itself will not affect the data sent to the server. The entry will be sent to the server in its original case, even though it may appear in upper case. For that reason, in addition to the special in-line style sheet attribute, the RPGspUpper() function is used in the LoadFormData code to finalize the conversion to upper case.
Allows you to specify database file relationships to be used in wizard-generated applications. This dialog can be opened by pressing the Related Files button on the Field Selection dialog of a the View Record wizard, or any subfile wizard.
Related File Name
Type in or select the name of a database file you want to include fields from. If you have retrieved the field definitions for this particular file before, the file description and record format name will be displayed, and key fields will automatically be populated in the Match Key Fields window. Otherwise, you must click the blue button to get the field list from the iSeries.
Library Name
The Library Name field is used for locating the specified file when the "Get Key Fields from iSeries" button is used. It is recommended that you leave this field blank, in which case the compile-time library list defined under Tools -> Options is used. To change the library list on the fly, click on *LIBL.
Match Key Fields
For each key field in the related file, select a field to join from the application's main database file or from another related file in use by the application. Any fields from a related file that you include in your application will be retrieved by using the joined field as the key when reading a record from the related file.
Add
Opens the Add Related Files dialog, where you can specify a new related file to be used by your application.
Change
Opens the Change Related Files dialog, where you can make changes to the selected related file.
Remove
Removes the selected related file from your application. You will be prompted to confirm.
After you have chosen which files to Add, Change, or Remove, press OK, and all fields from your related files will be available for use in the wizard's Field Selection dialog.
Profound
Logic Software, Inc.
www.ProfoundLogic.com
(937) 439-7925